


Opening a Polaris pool cleaner primarily involves releasing the top lid latch or unscrewing the filter housing cap, depending on whether you own a suction-side or pressure-side model. The specific mechanism determines how you access the internal debris basket or filter bag for emptying. Most units are designed with user-accessible hatches to allow routine maintenance without professional tools.
Understanding the difference between the two main Polaris types prevents unnecessary disassembly and potential damage to internal seals. Suction-side cleaners typically feature a top-loading debris chamber, while pressure-side models often use a side or bottom filter bag that requires removing a retaining ring or screw. Knowing which type you have saves time and ensures you follow the correct safety steps before opening the unit.

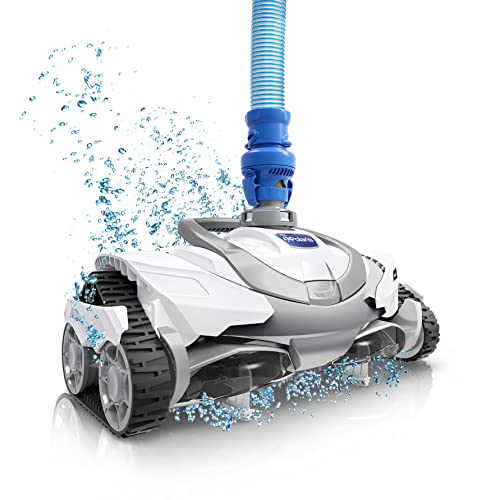


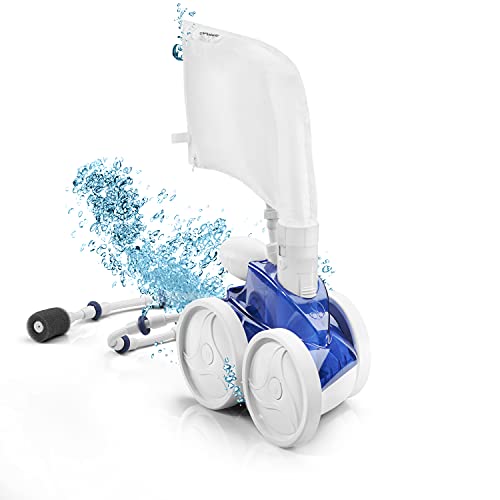


The method for opening your cleaner depends entirely on its propulsion system. Suction-side units rely on your pool pump to pull water through the cleaner, creating a vacuum that lifts debris into a top-accessible basket. Pressure-side units use a booster pump or return line pressure to push water through venturi jets, directing debris into a filter bag located within the main body. Identifying your model is the first critical step before attempting to open any part of the cleaner.
| Feature | Suction-Side (e.g., MAXX) | Pressure-Side (e.g., Vac-Sweep 280/380) |
|---|---|---|
| Debris Access Point | Top Lid or Front Hatch | Side Panel or Bottom Cap |
| Opening Mechanism | Push-button Latch or Twist Lock | Retaining Ring or Quarter-Turn Screw |
| Filter Type | Mesh Basket or Pleated Cartridge | Single Chamber Filter Bag |
| Power Source | Main Pool Pump | Booster Pump or Return Line |
Before you begin, ensure the cleaner is out of the water and placed on a stable, flat surface. You do not need to submerge the unit to empty the debris, and doing so can make handling more difficult due to added weight. Keep a bucket or trash bin nearby for the debris you will remove. If your cleaner has a hose attached, disconnect it from the pool plumbing to prevent water from draining into the unit while you work.
- Identify the model type by checking the nameplate or manual.
- Disconnect the cleaner from the pool plumbing and remove from water.
- Place the cleaner on a flat, stable surface away from the pool edge.
- Prepare a trash bin or bucket for collected debris and water.
Opening Suction-Side Cleaners
Suction-side cleaners like the Polaris MAXX series are designed for easy top-loading maintenance. The debris basket is typically located in the upper chassis, protected by a lid that snaps or latches into place. To open this, locate the release mechanism, which is often a push-button latch on the front or side of the lid. Press the button firmly and lift the lid vertically. Some models use a twist-lock mechanism; in these cases, rotate the lid handle or cap counter-clockwise until it releases, then lift it off.
Once the lid is removed, you will see the mesh basket or pleated filter cartridge. Carefully lift the basket out to empty the debris. Rinse the basket with a garden hose to remove fine silt and sand before reinserting it. Ensure the basket sits flush in its housing before closing the lid. A misaligned basket can cause leaks or reduce suction efficiency during the next cleaning cycle. Close the lid firmly until you hear a click or feel it lock into place.
Opening Pressure-Side Cleaners
Pressure-side cleaners such as the Vac-Sweep 280 and 380 store debris in a filter bag inside the main body. Accessing this bag requires removing a specific cover, which varies by model. On many Vac-Sweep models, the filter bag is accessed from the bottom or side of the unit.
Locate the retaining ring or quarter-turn screw that holds the filter housing cap in place. Turn the ring or screw counter-clockwise to release the cap. If your model uses a blue or red restrictor disk, note its orientation before removing it, as it must be reinstalled correctly to regulate water flow.
Lift the cap to expose the filter bag. Gently pull the bag out by its zipper or opening. Empty the debris into a trash bin, being careful to dispose of large items like acorns or pebbles properly. Rinse the filter bag if it is clogged with fine debris, but allow it to air dry completely before reinserting it.
A wet bag can develop mildew or tear more easily. Reinsert the bag, ensuring the zipper or opening is aligned correctly, and replace the cap. Tighten the retaining ring or screw clockwise until it is secure but not over-torqued, which could crack the plastic housing.
- Locate the filter housing cap on the side or bottom of the unit.
- Turn the retaining ring or quarter-turn screw counter-clockwise.
- Remove the cap and carefully extract the filter bag.
- Empty debris and rinse the bag if necessary before reinserting.
- Replace the cap and tighten the retaining mechanism securely.
Accessing Scrub Brushes and Tail Scrubbers
While the primary goal of opening the cleaner is often debris removal, you may also need to access the scrub brushes or tail scrubbers for maintenance. These components are located at the bottom of the unit or at the end of the sweep hose.
To replace a tail scrubber, you typically do not need to open the main body. Instead, remove the worn scrubber from the end of the hose and slide the new one into place. Ensure the new scrubber is oriented correctly so it extends outward when the cleaner is in use.
For bottom scrub brushes, you may need to flip the cleaner over and remove a retaining clip or screw. These brushes are often replaceable without disassembling the entire unit. Check the manufacturer’s instructions for your specific model to determine if the brushes are removable from the bottom or if they require opening the main chassis. Properly maintained brushes ensure effective cleaning of pool surfaces and prevent debris from sticking to the floor and walls.
Common Obstacles and Troubleshooting
Users often encounter stiff latches or caps that are difficult to open, especially after the cleaner has been exposed to pool chemicals and water for an extended period. If a latch is stuck, do not force it with excessive pressure, as this can break the plastic housing.
Instead, gently wiggle the latch or cap to loosen any debris or mineral buildup. You can also apply a small amount of silicone-based lubricant to the moving parts if the manufacturer’s guidelines permit it. Avoid using petroleum-based products, which can degrade the plastic and rubber seals over time.
If the filter bag is difficult to remove, check for debris caught in the zipper or retention clips. Use a soft brush to clear any clogs before attempting to pull the bag out. If the cap will not turn, ensure you are rotating it in the correct direction. Some models use a lefty-loosey mechanism, while others may require a specific tool. Refer to the user manual for the exact opening procedure for your model to avoid damaging the internal components.
Regular maintenance is key to keeping your Polaris cleaner operating efficiently. Emptying the debris basket or filter bag after each cleaning cycle prevents clogs that can reduce suction or pressure. Inspect the brushes and tracks for wear and replace them as needed.
If you notice reduced cleaning performance, check the pool pump and booster pump flow rates to ensure they meet the cleaner’s requirements. For more detailed guidance on maintaining your pool equipment, see our guide on pool equipment selection, which offers tips on choosing the right maintenance tools for your setup.
Always follow the manufacturer’s safety guidelines when servicing your pool cleaner. Disconnect the power source if your cleaner is electric, and ensure the unit is dry before handling internal components. Proper storage and regular cleaning will extend the life of your Polaris cleaner and keep your pool water clear and healthy. If you are unsure about any step in the opening process, consult the user manual or contact the manufacturer for specific instructions for your model.




Write Your Review
No reviews yet. Be the first to share your experience!