


Accessing the mechanical bay of a portable spa often begins with figuring out how to remove hot tub siding without damaging brittle exterior panels or hidden fasteners. Homeowners typically need to open their spa cabinet to inspect plumbing unions, diagnose a tripping GFCI breaker, service a circulation pump, or conduct deep seasonal maintenance. Modern synthetic composite and traditional wood skirts protect sensitive internal components from moisture, rodents, and freezing temperatures, but their mounting hardware is not always obvious. Taking the time to locate fastener tracks and isolate electrical connections prevents costly cosmetic cracks and ensures safe cabinet access.
Before unscrewing any exterior panels, securing the surrounding area and shielding the acrylic shell with a protective patio hot tub cover prevents debris from blowing into the water. Spa cabinets endure intense environmental exposure, meaning plastic screw caps may become stiff while wood staves might swell from humidity. Understanding the structural differences between tongue-and-groove slats, interlocking synthetic sheets, and removable equipment access panels makes the entire disassembly process straightforward. With the right basic hand tools and a careful approach, taking off spa skirts allows you to reach internal components quickly and maintain peak hydrotherapy performance.


Comprehensive Guide to Hot Tub Siding Removal and Cabinet Access
Removing hot tub siding requires a systematic sequence of power isolation, fastener location, and panel release to avoid cracking aged synthetic materials or damaging interior plumbing lines. Most portable acrylic hot tubs feature at least one designated service door, typically situated directly beneath the topside electronic control keypad, while adjacent panels interlock through tongue-and-groove channels or corner brackets. Rushing the process without identifying hidden screws or trim clips can snap plastic retaining tabs and compromise structural weather sealing. Following a methodical disassembly procedure ensures seamless access to pumps, heaters, and pipe unions for troubleshooting or preventative care.
Electrical Safety and Power Disconnection Protocol
Working inside an energized spa cabinet presents severe electrical hazards due to the combination of high-voltage wiring, damp insulation, and condensation. You must disconnect power at the dedicated outdoor emergency GFCI breaker box located at least 5 feet from the water edge in accordance with National Electrical Code safety standards before touching any cabinet fasteners. Turning off the breaker at the main residential electrical service panel provides an added layer of safety against accidental re-energization during maintenance. Never rely solely on turning down the temperature dial or pressing standby mode on the topside digital control panel.
Once you switch off both the main house breaker and the external GFCI subpanel disconnect switch, confirm zero voltage using a reliable non-contact voltage tester. Opening a cabinet while power remains active exposes you to bare terminals on the heater barrel and circulation pump relays that carry 240 volts and up to 50 amps of electrical current. Even standard 120-volt plug-and-play spas must have their power cords completely unplugged from the outdoor GFCI receptacle before you remove any access panels. Taking a few seconds to verify the absence of electrical current protects your household and prevents accidental short circuits against internal metal framing.
Identifying Cabinet Materials and Fastener Types
Hot tub cabinets are typically constructed from either natural cedar staves, dense synthetic composite slats, or large thermoformed PVC sheets designed to mimic real wood grain. Natural cedar skirts often use traditional wood screws driven directly into the internal vertical stud framing, whereas modern composite cabinets rely on interlocking tongue-and-groove profiles that slide into horizontal retaining tracks. Composite materials resist rot and insect damage, but prolonged ultraviolet exposure can make aged plastic panels brittle during cold weather. Determining whether your cabinet uses independent vertical slats or continuous multi-slat modular sheets dictates how you must support each section during removal.
Fasteners on luxury spas are intentionally concealed to maintain clean exterior lines and protect metal hardware from weather exposure. Manufacturers frequently hide screw heads beneath color-matched plastic snap caps, flexible vinyl trim strips, or decorative corner caps. You will generally need a basic screwdriver set equipped with standard Phillips, square drive, and Torx bits, as spa builders vary hardware types across different model years. A plastic automotive trim pry tool is also invaluable for popping off decorative screw covers without scratching the surrounding composite surface or gouging the acrylic shell lip.
Removing Corner Caps and Exterior Trim Strips
Disassembling a spa skirt almost always starts at the vertical corner caps rather than the center of a flat panel. These molded plastic or composite corner pieces wrap around the structural corner posts and overlap the edges of the adjacent flat wall panels to lock them into place. Inspect the vertical seams of each corner piece to locate the retaining screws, which are often arranged in a vertical line of three or four fasteners per corner. Back out these screws carefully and store them in a labeled container so they do not get lost in nearby patio gravel or lawn turf.
Some modern spa designs use split two-piece corner caps where an outer decorative cover snaps over an internal mounting bracket. Gently insert a plastic pry bar beneath the lower edge of the outer trim cap and pry outward to release the internal plastic retaining clips. Once you remove the outer trim cover, the primary structural screws securing the inner corner bracket will be exposed for easy removal. Taking off both corner assemblies on either side of a flat wall section completely frees the perimeter edges of that wall, allowing the main panels to move freely.
Detaching the Main Equipment Access Panel
The primary equipment access panel is almost always positioned directly below the topside keypad where the central control pack, heater assembly, and circulation pumps reside. Look along the bottom perimeter edge of this front panel for a horizontal retaining channel or a series of bottom mounting screws. If visible screws secure the bottom edge, remove them while supporting the weight of the panel with your free hand to prevent it from dropping outward suddenly. In many designs, the top edge of the panel tucks neatly under the protective overhang of the acrylic shell lip.
To disengage a panel held by top and bottom tracks, lift the entire panel upward by a half-inch so the bottom edge clears the lower retention lip. Tilt the bottom of the panel outward toward you at a slight angle, then slide the upper edge downward out from beneath the acrylic shell edge. Be mindful of any external accessories mounted through the siding, such as cabinet-mounted drain valves, external LED footwell lights, or audio speaker grills. Disconnect any low-voltage wiring quick-connect harnesses before pulling the panel completely away from the spa frame to prevent ripping delicate wires.
Disassembling Tongue-and-Groove Interlocking Side Panels
Removing side and rear cabinet panels on hot tubs with tongue-and-groove construction requires working from the edges toward the center. Once the corner caps are detached, the outer edge of the first vertical composite slat becomes accessible. If the slats are held in place by a continuous top or bottom horizontal aluminum rail, you may need to back out the rail mounting screws to create sufficient vertical clearance. Sliding the first slat horizontally away from the interlocking tongue of its neighbor unlocks the entire wall run section by section.
Never pry aggressively in the middle of an interlocking composite wall because synthetic slats can crack cleanly down their center when bent past their tolerance. Instead, slide each slat progressively along the track until it reaches the open end where it can be lifted free without resistance. Lay the removed slats in sequential order on a clean tarp or soft grass area to make reassembly straightforward later. Labeling the backs of individual slats with a piece of painter tape ensures that pre-drilled screw holes align perfectly when you reassemble the cabinet.
Navigating Interior Insulation and Protecting Plumbing Lines
Once the exterior panels are removed, you will encounter the spa insulation system, which varies dramatically depending on whether the unit uses full-foam polyurethane or perimeter thermal barriers. Perimeter-insulated hot tubs feature foil-faced bubble wrap or rigid foam board panels mounted just behind the siding slats, which can be easily lifted out or folded back to reveal the internal plumbing. Full-foam hot tubs, on the other hand, fill the entire cabinet cavity with dense expanded polyurethane foam that encases all internal pipes, manifold fittings, and jet bodies. Working around these internal barriers with care prevents accidental damage to water lines and wiring harnesses.
If your spa uses full-foam insulation and you need to locate an internal water leak, avoid using sharp metal shovels, utility knives, or screwdrivers that can easily slice through flexible PVC tubing. Dig into the foam using a stiff putty knife with rounded corners or use your hands while wearing heavy work gloves to excavate targeted sections around suspect pump unions or jet manifolds. Protecting the overall thermal envelope is crucial, and pairing your cabinet maintenance routine with a protective spa cover with warranty ensures that your outdoor investment retains heat effectively even during freezing winter months. Save large chunks of intact foam so you can press them back into place before closing the skirt.
Inspecting Internal Components and Surface Care
Having the cabinet open provides a prime opportunity to inspect critical mechanical equipment that remains hidden during everyday soaking. Examine the pump wet-end volutes, heater split-nut unions, and knife valves for signs of crusty dried chemical residue or active dripping that indicates failing O-rings. Check the base frame for signs of rodent nesting, chewed electrical insulation, or moisture pooling that could rot structural timber studs over time. Taking a few minutes to vacuum out dry debris, spiderwebs, and leaves from the equipment floor improves airflow around the electric pump motors and prevents motor overheating.
While the siding panels are detached, cleaning both sides of the synthetic slats and the exposed acrylic edges helps prolong the life of the spa exterior. Applying Shell Cleaner by EcoOne | All-Natural allows you to wipe away accumulated grime, mildew, and scum lines without introducing harsh perfumes, dyes, or caustic chemical residues that could degrade sensitive synthetic materials. This foam-free, pH-neutral spray works effectively across acrylic surfaces, vinyl trim, and synthetic cabinet materials. Keeping the exterior surfaces clean prevents stubborn mold stains from embedding into composite wood-grain textures while the cabinet is dismantled for service.
Flushing Plumbing Lines and Addressing Chemical Scale
If you removed the cabinet siding to address persistent water circulation issues or perform seasonal drain-and-refill maintenance, cleaning the internal plumbing lines is a vital step. Adding Clorox® Pool&Spa™ System Cleanse to the water before draining helps purge deep plumbing build-up, dislodging accumulated non-living organic waste, body oils, and biofilm trapped inside hidden jet manifolds. Running this system cleanser through the jets circulates the formula throughout the entire internal plumbing network, enhancing overall filter performance and restoring clean flow rates. Purging internal lines before reinstalling panels ensures that fresh water fills into clean pipework without lingering odor.
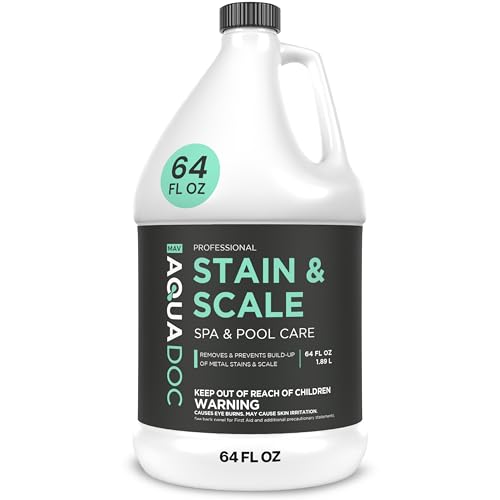
Internal plumbing unions and heating elements are also prone to mineral crusting and metal discoloration when source water contains elevated calcium levels or dissolved minerals. Treating the water with AquaDoc Pool & Spa Stain and Scale Remover for Hot helps dissolve chalky calcium deposits and prevents metal stains across submerged heating coils and pump impellers. This formula is compatible with both bromine and chlorine sanitizing regimens, functioning as a reliable water conditioner that mitigates scale build-up inside internal heater assemblies. Maintaining balanced calcium hardness and preventing scale ensures your heating elements operate efficiently without triggering low-flow heater errors.
Reinstalling Cabinet Siding and Restoring Weather Seals
Reassembling the hot tub skirt follows the exact reverse sequence of disassembly, beginning with any interior insulation blankets or perimeter reflective foam boards that were removed during maintenance. Ensure that internal electrical wires, sensor leads, and flexible air hoses are tucked securely away from hot pump motors and vibrating metal plumbing brackets before mounting exterior panels. Slide the bottom edges of the side panels firmly into their horizontal base tracks, ensuring each tongue-and-groove joint seats completely flush against its neighbor. Never force warped composite slats into place with excessive pressure, as misaligned joints can buckle under outdoor temperature swings.
When driving screws back into composite panels or wooden frame studs, adjust your cordless drill clutch to a low torque setting or hand-tighten the fasteners with a manual screwdriver. Over-tightening steel screws into synthetic plastic skirts easily strips out the underlying timber framing or cracks the perimeter holes of brittle panels. Once all flat wall panels are aligned and secured, reattach the corner caps and snap the decorative screw covers back into position to seal out moisture and insects. Inspect the entire lower base perimeter to confirm that rodent mesh and ventilation screens remain intact, protecting your internal machinery from unwanted pests.
Removing hot tub siding is an essential maintenance skill that grants direct access to pumps, heaters, and internal plumbing unions whenever service or leak inspections are required. Working patiently, isolating electrical current at the outdoor GFCI disconnect switch, and keeping fasteners organized ensures that the cabinet disassembles smoothly without structural or cosmetic damage. Thoroughly inspecting internal fittings, purging pipe lines, and conditioning water surfaces while the cabinet remains open maximizes equipment lifespan and prevents recurring service issues. Reinstalling each panel with measured torque and proper alignment keeps your spa looking pristine while maintaining dependable thermal insulation through every season.





Write Your Review
No reviews yet. Be the first to share your experience!